How to Export Sales Navigator Lists to a CSV File

For any sales leader, working efficiently with lead data is crucial. If you’re using LinkedIn Sales Navigator to identify and track prospects, exporting that data into a CSV file is often the next step to streamline workflows, share with your team, or analyze at scale. But here’s the catch: LinkedIn Sales Navigator doesn’t offer a direct CSV export option.
That’s where Surfe comes in. Surfe bridges this gap by offering simple and effective ways to export your Sales Navigator lists into CSV format. In this article, we’ll walk you through three practical methods to export your lists— using Surfe’s integrations with Google Sheets, your CRM, and the upcoming Surfe App. Whether you prefer spreadsheets or centralized CRM management, you’ll find a solution that fits your workflow.
Three Easy Methods to Export Sales Navigator Lists with Surfe
- Exporting via Google Sheets Integration
- Exporting via CRM Integration
- Exporting via the Upcoming Surfe App
Let’s break down each method and show you exactly how to export your Sales Navigator contacts quickly and efficiently.
Method 1: Exporting Sales Navigator Lists via Google Sheets Integration
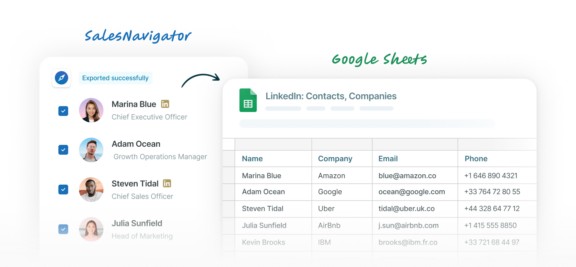
If you’re a spreadsheet wizard and love using Google Sheets, this method is for you. Exporting your Sales Navigator lists through Google Sheets is a smooth, highly versatile process. All you need is to connect your LinkedIn Sales Navigator to Google Sheets through Surfe, and you’ll have your list ready in no time.
Step 1: Connect Surfe to Your Google Sheets Account
To begin, you’ll need to establish a connection between your Surfe account and Google Sheets. Here’s how:
- Open Surfe and navigate to the Integrations tab.
- Find Google Sheets in the list of supported tools.
- Click Connect and follow the simple authentication steps to link your Google account.
In just a few clicks, Surfe will be synced with your Google Sheets, and you’ll be ready to export your Sales Navigator data.
Step 2: Build Your List on Sales Navigator
Once your integration is set up, it’s time to head over to LinkedIn Sales Navigator. Start by building your list:
- Use Sales Navigator to search for the leads or accounts that match your prospecting criteria.
- Narrow down your list using filters such as industry, location, or company size, and then start saving the relevant leads to a list.
You can build a list for leads, accounts, or both, depending on your sales goals.
Step 3: Export Your Sales Navigator List to the Connected Google Sheet
Now comes the magic— exporting your contacts.
- In Sales Navigator, after building your list, look for the Surfe extension or button, which gives you the option to export data.
- Select the leads or contacts you want to export.
- Choose the Google Sheets export option within Surfe. The selected contacts will automatically populate a pre-connected Google Sheet.
Step 4: Download the List from Google Sheets as a CSV
Finally, once your data is in Google Sheets:
- Open the exported sheet in Google Sheets.
- Navigate to File > Download > Comma-separated values (.csv).
- The sheet will download instantly as a CSV file, ready to be imported into your CRM, analyzed, or shared with your team.
Why Choose This Method?
This process is ideal if you’re comfortable with spreadsheets and want a quick, straightforward export option that allows for collaboration with other team members on your Gsuite. Google Sheets provides flexibility for customizing the exported data before saving it as a CSV file.

Method 2: Exporting Sales Navigator Lists via CRM Integration
If your sales process is tightly linked to your CRM, this method (integrating your CRM with LinkedIn) will help you bridge LinkedIn Sales Navigator with your existing workflows. Surfe offers integrations with popular CRMs such as Salesforce and HubSpot, enabling you to export Sales Navigator lists directly into your CRM and then export them as CSVs.
Step 1: Connect Your CRM to LinkedIn Using Surfe
The first step is to integrate your CRM with LinkedIn Sales Navigator using Surfe.
- Within Surfe, go to Integrations and select your CRM—whether it’s Salesforce, HubSpot, Pipedrive, or another option.
- Follow the guided steps to authenticate and connect the two platforms. Once connected, you’ll be ready to start exporting lists directly from Sales Navigator.
Step 2: Build Your List on Sales Navigator
Just like in the Google Sheets method, begin by using Sales Navigator to build a list of contacts or leads:
- Use filters to narrow down your search and save the most relevant leads to your list.
- You can save leads manually or use Sales Navigator’s automated features to help with lead suggestions.
Step 3: Export the List to Your CRM
Now that you’ve built your list, export it into your CRM:
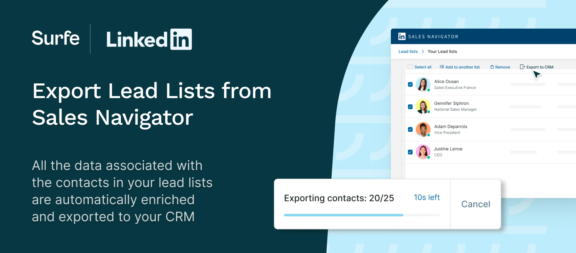
- Go back to Sales Navigator and, using the Surfe integration, export your chosen contacts directly into your CRM.
- The list of contacts will sync seamlessly with your CRM’s contact database.
Step 4: Ensure All Contacts Are Organized in Your CRM
Once exported, it’s important to ensure all contacts are properly organized into a list within your CRM. While Surfe does an excellent job of exporting contacts, it won’t automatically create a specific list in your CRM. You may need to organize these contacts manually, adding them to a custom list based on your preferred structure.
Step 5: Export the List from Your CRM as a CSV
To finish the process:
- Navigate to your CRM’s contact list or segment, where your exported leads are located.
- Use the CRM’s export function to save the list as a CSV file. The exact steps may vary depending on your CRM, but typically, it’s under Settings or the list’s menu.
- Download the CSV file, and you’re ready to use it for analysis, email campaigns, or other purposes.
Why Choose This Method?
If your CRM is the center of your sales process, this method ensures that your Sales Navigator leads are instantly available in the same tool you use for lead management, pipeline tracking, and outreach. This keeps all your data in sync, enhancing team collaboration and accuracy.

Method 3: Exporting Sales Navigator Lists via the Surfe App
If you’re looking for a centralized one-stop-shop, the Surfe App offers an even smoother experience for exporting lists from Sales Navigator. This method simplifies the entire process into a few clicks — ideal for those who prefer an intuitive, standalone tool.
Step 1: Build Your List on Sales Navigator
Begin the process as you normally would by building a list of contacts in Sales Navigator:
- Use your preferred filters and search parameters to create a high-quality list of prospects.
- Select the leads or accounts that best fit your criteria.
Step 2: Use the New “Add to Surfe List” Feature
Here’s where the Surfe App makes things even easier:
- After selecting your contacts in Sales Navigator, you’ll see a new option: “Add to Surfe List.”
- Click this button, and your selected contacts will automatically be transferred into a list within the Surfe App.
This eliminates the need to go through multiple steps or manually export to another tool.
Step 3: Head Over to the Surfe App to View and Manage Your Lists
Once your contacts are added to the Surfe App:
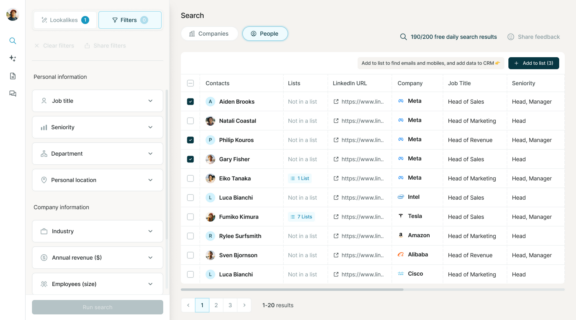
- Open the Surfe App, and navigate to the Lists section.
- You’ll see all your recently exported Sales Navigator contacts, neatly organized into lists. You can manage, edit, or combine lists as needed.
Step 4: Download Your List as a CSV from the Surfe App
To export your list as a CSV:
- Select the list you wish to export.
- Look for the Download as CSV button in the Surfe App interface.
- Click it, and your contacts will download instantly as a CSV file.
Why Choose This Method?
The Surfe App offers a centralized location to manage all your contact lists, making it perfect for sales leaders who want to simplify the workflow of their teams. It’s still in development, but will be a huge time hack for making the prospecting phase quicker and more efficient.

Let’s Wrap it Up!
Without a native tool in LinkedIn, translating your Sales Navigator lists to a CSV file may seem like a real time drain that requires laborious manual data entry. But with Surfe, you can export your lists in minutes. Whether you prefer working in Google Sheets, integrating with your CRM, or using the Surfe App to handle the whole process, there’s a method that fits your workflow perfectly.
By following the steps outlined in this guide, you can quickly export your valuable sales data and spend more time on what matters most— closing deals, building relationships and making sales.

Want to streamline your Sales Navigator exports?
With Surfe, you can make data CSV exports a breeze.
Frequently Asked Questions (FAQs)
- Can I export directly from LinkedIn Sales Navigator as a CSV?
No, Sales Navigator doesn’t have a native CSV export feature. With Surfe, you can export your Sales Navigator Lists in just a few clicks – easy! - How accurate is the data export using Surfe?
Surfe’s email finder has a find rate of 93%, so you know your outreach campaigns will reach the right email inboxes - Is the Surfe App available now?
The Surfe App is in its final stages of development and will be available soon. Stay tuned!


