How to Create a Cold Email Campaign in 5 Steps

Sometimes as a sales professional, you enter a difficult place. A place where the landscape is barren; no deals in sight.
You search high and low, getting in touch with old contacts and strategizing new ways to find clients. No joy.
You keep walking and come to a river. On the other side of the river is a land made up of your wildest dreams. New leads wherever you turn. Deals closing once, twice, thrice daily. And wait, is that you being hoisted on the shoulders of the rest of your team? Are you wearing…a crown?!
You need to get there. But the river is deep and strong. Out of the corner of your eye, you see every deal you’ve ever lost in its watery depths.
Fortunately, you know what you’re going to do. You’re going to build a bridge. Your material of choice? A cold email campaign.
Keep reading, and you’ll be in the land of sales success in just 5 steps:
- Selecting Your Tools
- Building Your Lead Lists
- Enriching and Handling the Data
- Building Your Campaign in Your CRM
- Deploying, Tracking, and Iterating
Let’s get building 👇
Selecting Your Tools
What, you didn’t think you were going to build a bridge with your bare hands, did you?
The first step in creating a cold email campaign is choosing the right tools. Without further ado:
LinkedIn Sales Navigator
The first member of your toolbox is LinkedIn Sales Navigator. It’s a tool by (you guessed it) LinkedIn that lets sales reps dig deeper into their networks and find more people who might want to buy from them.
Its powerful filtering makes it easier than ever to find people who match your Ideal Customer Profile (ICP). And the more relevant your leads are, the more success your cold email is going to have.
Wondering how to use it? Patience, child. We’re getting there in the next section.
Your CRM (Customer Relationship Management tool)
Your CRM is critical for tracking, planning email campaigns, and actually sending them out. On the off chance you’re reading this blog post and have yet to choose a CRM for your business, we recommend Pipedrive. It’s the only CRM that’s built for salespeople, and salespeople only, which makes us feel pretty special.
Your CRM also helps you to manage your pipeline and automate your workflows – key to efficient sales.
Surfe
You’ve got your contacts from LinkedIn Sales Navigator, and your CRM is ready and waiting to accept them. But how do you transfer them from one to the other?
Manually?
God no. That takes up far too much time, and there’s room for a lot of human error (no offense – nobody’s perfect, not even you).
Instead, get Surfe to do it for you. It couldn’t be easier – once you’ve got the Surfe Chrome extension set up and ready to go, you go about your business finding new contacts on Sales Navigator as usual. Once you’ve got a nice list ready to go, you can add them from Sales Navigator to your CRM in just one click.
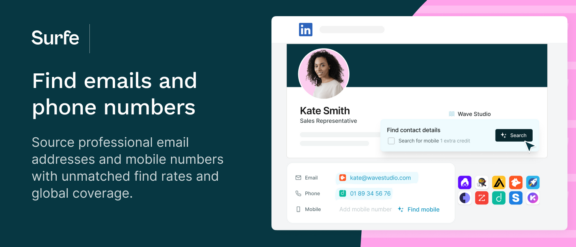
The best bit? Surfe also finds their email addresses using its waterfall enrichment technology. That’s basically a fancy way of saying it aggregates the data from the very best databases out there, to 1) find contact data for your profiles of choice and 2) make sure it’s accurate. This contact data makes its way into your CRM too. Simple.
You don’t even need to worry about this contact data going out of date – Surfe does all the worrying for you. It constantly scans your LinkedIn contacts for changes, like, for example, a new job title, and then automatically feeds the new data through to your CRM.
Building Your Lead Lists
Let the building commence. Manual labor and (almost) sales stardom – who knew you were so multi-talented?
First things first, you want to use LinkedIn Sales Navigator to create targeted lead lists. Remember that advanced filtering we mentioned? Now is its time to shine.
You can search for people by job title, function, location and seniority. Or, if you’d rather conduct your search company-first, use it to look for companies with a certain revenue figure, team headcount or industry.
Once you’ve got a nice-looking selection of profiles, save them to a lead list. Hit the ‘lead list’ tab to come back to them at a later date.
Best Practices
Do you want a strong bridge (email campaign, if we’re in the real world) or a weak bridge?
Strong bridge? We thought so. Better follow these best practices:
Segmentation: Segmentation allows you to target your prospects more effectively. By breaking down your leads into specific segments (like industry or role, for example), you can make your emails all the more personalized. Different ways of segmenting your prospects include behavioral segmentation, firmographic segmentation and demographic segmentation.
Quality over quantity: Be honest: might the people on your new list genuinely want to hear from you? You want your cold email campaign to be successful – so make sure the people it’s going to are highly relevant to keep engagement rates high.
Enriching and Handling the Data
You’re almost halfway to the land of sales stardom – keep going!
Next up, you need to make sure that your contact information is in tip-top shape. Note: thanks to Surfe, this can be done before it goes anywhere near your CRM. Don’t mind us – just giving ourselves a pat on the back.
So, you’ve got a contact you like the look of on LinkedIn – just hit ‘add as contact’ and Surfe will start running through its databases of choice. Once it’s found an email address that looks like it might be correct, it validates it to ensure deliverability – in other words, to make sure your email lands in the inbox of the intended recipient.
Why do we put so much emphasis on making sure the email address is correct? Well, data accuracy is really, really important. Send an email to an incorrect address, and it’s likely to either bounce or (the horror) be marked as spam. In case we have to tell you – both of these outcomes are Not Good. They’re the markers of an unsuccessful email campaign – plus, high bounce rates and spam markers damage your domain reputation. A bad domain reputation can make it harder to send cold emails in the future. Not the outcome you want at all.
The other piece of the puzzle is efficiency. Think about it: before Surfe (we dread to think), how would you go about checking if an email address was correct? Probably involved a lot of manual activity, right?
As you know, time is tight for sales professionals. We have a million things to do every day, and we can’t drop the ball on any of them without our entire process falling apart. Why make your life harder with manual work when you could just…not do it?
That’s before we even get into the wasted time and effort of crafting the most beautiful email you’ve ever set eyes on, and then the only thing it sees is the inside of the spam folder. Now that’s inefficient – moral of the story, make sure you enrich your data.

Building Your Campaign in Your CRM
We’re now onto the final few building blocks: building your campaign in your CRM.
Want to know a secret? We’re a pretty spoilt bunch in 2024. Providing you have a good CRM, you can create automated workflows that add prospects to an outbound cadence based on certain conditions. In other words, you can set up emails to be sent later down the line – and you won’t even have to lift a finger.
For example, want to send an email to everyone who visits your pricing page more than once? You can do that. Or what if your prospects get promoted, and you want to congratulate them? You can do that too.
Want to know what one of these outbound cadences looks like? We’ve got you:
Outbound cadence example
- Day 1: Send a LinkedIn DM and follow it up with a cold call.
- Day 2: Send an introductory email, showing just how well you understand your prospects’ pain points.
- Day 3: No contact.
- Day 4: Follow-up email.
- Day 5: Email showcasing a specific use case – which you’re sure they’ll be interested in, thanks to your lead segmentation.
Email Campaign Best Practices
What goes into a brilliant email campaign? We’ll show you:
- Personalization: remember that lead segmentation you did way back when? Here’s where it comes in handy. Analyze historical data from your different lead segments, and you should have a pretty good idea of what they’re thinking and feeling (when it comes to work, at least). You can use these insights to shape your messages, and make them as attractive as possible to the recipients.
- Dynamic paths: your work isn’t over once you’ve designed your cadence (sorry). Picture this: you set up the cadence above, and then the lead replies to your LinkedIn DM. They’re desperate for a product like yours – can they hop straight onto a demo? You’d feel pretty silly if you then sent them an introductory email instead of a response saying yes, right? Keep an eye on what’s happening to make sure you’re squeezing every ounce of value from your cadences.
Deploying, Tracking and Iterating
The campaign’s out in the wild – congratulations! Before you start running over your bridge toward success, we just need to apply the finishing touches.
First things first, you need to monitor performance metrics. The key ones to track are:
- Open rates: basically, the rate at which your emails are opened. Use these to judge whether your subject lines need tweaking, or whether they’re spot on.
- Click-through rates: this is another way of judging whether people read your emails, and how engaged they are with the content. High click-through rates indicate that they’re hitting the mark.
- Conversion rates: how many readers followed through to the desired outcome? If it’s a lot, well done you! If it’s only a little, try tweaking your CTA or the language around it to make it more enticing.
Use these insights to refine your strategy and improve future campaigns, using:
- A/B testing: test one subject line against another, or see if your prospects would be interested in this pain point or that pain point. These experiments will (hopefully) reveal a clear winner, which you can then use in your next campaign.
- Feedback loops: get into the mindset of continuous improvement. Use data to understand what works and what doesn’t and then adjust your approach accordingly. A loop never ends – neither should your learnings.
How to Create a Cold Email Campaign: Final Thoughts
Your work is done. You’ve used the best tools to find, segment, and enrich all the email addresses you need, then crafted a personalized, data-driven campaign that’s going to get everyone begging to buy from you.
Add ‘bridge-builder’ to your list of achievements, send that email campaign, and start taking your first steps to sales stardom. We always thought you’d look good with a crown.

Woah, what just happened there?
Almost like we were in a fantasy world or something. You know what isn’t a fantasy, though? How good Surfe is at finding emails. Oh – it’s free, too.
FAQs about Creating a Cold Email Campaign
Do Cold Email Campaigns Work?
Cold email campaigns work, but in order for them to be successful they have to be sent to prospects that are relevant and closely match your company’s ICP. Making sure each email is personalized and part of a multi-touch, multi-channel sales strategy is also key.
How Do You Create Cold Email Leads?
Create cold email leads using LinkedIn Sales Navigator. It has advanced filtering capabilities that allow you to identify people who closely match your Ideal Customer Profile (ICP). Once you’ve built a list full of promising profiles, use a tool like Surfe to find and validate their email addresses and automatically sync the data with your CRM of choice.
How Long Should A Cold Email Campaign Be?
In a nutshell: short. You want your cold emails to be 4 sentences long, 5 at a push. Prioritize white space over blocks of text, and keep it concise and to the point. Make sure you combine these emails with other touchpoints, across other channels like LinkedIn, phone and voicemail.


